Monday, April 30, 2012

Catching a dream

Image634712223260469898Image634712213083807826Image634712224210934261
For the next craft club – we are going to try our hand at making dreamcatchers.  They are deceptively easy to make and look fantastic strung up.

Apart from the aesthetic magnificence of a dreamcatcher, this woven talisman has a noble metaphysical purpose – it catches your bad dreams, traps it its web and then only filters through the pleasant ones.  The pleasant dreams slip down the fluffy feathers into the sleeper’s restful mind.

A cultural vestige of the Ojibwa Native American Tribal Nation of North America, the dream catcher gained enormous commercial popularity as an ubiquitous pop-symbol in the 60’s and 70’s as it came to be adopted by New Age Groups and the Hippy-movement. Most Pan-Indian Tribal groups consider this to be an offensive misappropriation of sacred culture. 

As we reflect on this – I have a few questions I would like you to consider – what do you think?  Who controls culture?  Are items that associated with certain cultural traditions the property and control of the custodians of the originating culture?  When does a lifestyle something become “culture”, what begins culture and who has the right to control who or what adopts it.  When does something shift from being iconic to sacred?  For instance are blue denims, white stars and red stripes the property of the American sacred culture?  Should it be that the reverence afforded to it become perverted by commercial pop-culturalisation, would Americans have a right to claim authority and/or injustice based on the fact that these symbols both originated in that particular form  and are an integral part of the sacred culture of America.  Is culture itself inherently sacred and incontrovertible?

What you are going to need to bring is:

1.  A thin bangle

2. a few  beads

3. a few feathers (if you want to make it look really authentic)

4.  some crochet cotton (enough to weave-fill the the area inside of the bangle)

5.  some thin cloth or silk ribbon [NOTE: not the plastic kind or curling gift wrapping ribbon.  You need proper cloth ribbon, the kind that you get from a fabric store for clothes].  You need enough to wind around the entire diameter of the bangle twice.

6.  a needle (that has an eye big enough to thread your crochet cotton)

7.  a pair of sharp scissors

8.  patience

Here is the little dreamcatcher I just made:

Well, what do you think?  Are you up for the challenge?  I hope you are!  See you at the next craft club.

Friday, April 27, 2012

Origami madness...

It was a mess of paper, laughter and cramped fingers as we got down to making little origami dresses to use as embellishments for a gift series consisting of a birthday calendar book, fridge magnet and card for Mothers Day.

It was a project that had to be created from scratch.  A serendipitous side-effect of having to prepare materials for the club on a budget that is non-existent - is that it is forcing me to find creative solutions to work around our little obstacles.  In the process I am discovering things that I otherwise would not have had the opportunity to engage, had it not be born out of this particular necessity.  I am grateful that it is constantly challenging my own creativity and hones my problem solving skills. 


We did not have proper Origami paper squares at our disposal.  So before the class, I set to work at creating the Origami Squares themselves  - I used Microsoft's design tools in Power Point to draw 10 by 10 squares and fill them with patterns and designs that a mom might find appealing.  I also brought along various scraps of gift wrap, patterned paper and media paraphernalia that I could spare out of my house. 

Students then had the unfortunate task of painstakingly cutting out the squares so that it was an absolutely perfect square.  They were meticulous in this regard.  One could almost touch the intense concentration in the room.


 The thing that drew the most laughter during the club meet that day was big, burly boys, with big clunky fingers folding itty bitty paper dresses.  They were really fantastic sports though and tackled the project with the same kind of spirit they would devote to a manly Rugby match but with the fine tuned finesse of a ballerina. 


We began the club at 1:30pm - by 3:30pm they were still furiously folding - I reluctantly asked them to pack up and finish their projects at home.  I have a feeling we could have been there until 5pm, if I had allowed them to.  They were really serious about those little paper dresses.....but alas we were already an hour over time - I had marking to finish and a paper to finalize and we needed to vacate the Philosophy Boardroom. 

By the next morning I had the suspicion that it might very well be that Origami Fever has virulently taken hold of the all the students, as I discovered upon entering my office - a few students had left notes that they had come by earlier to show me what they had come up with.   Fortunately I did manage to see Pona Litheko in the morning and was able to get some wonderful pictures of her project.

I was thrilled to see how students adapted the original design and added their own touches to it. I loved her addition of frothy, frilly "tissue-paper lace" to the top of the dresses.  I also loved the effect of the burned edges on the book text background and how it added dramatic contrast to the focal point.  Every single time we have held the craft club, and the students bring back their own projects - I am always blown away by the genius of their creative spirit. 


Pona Litheko

I must apologise to the students whose projects I didn't manage to photograph.  I will post your pictures and projects to this blog post once I have managed to photograph your fantastic work.

It was a bit of a busy day, I was scheduled to deliver a paper at the Lunch Hour Seminar on the Hands On Craft Project later on in that day to members of the Faculty of Arts and I was perhaps a little preoccupied with that, in addition to managing all my regular work effectively.

  Unfortunately, there were three different seminars scheduled on campus for that day and at that time so the turnout to the seminar was a little more scant than usual - but we were pleased to have been supported by members of the English, Sociology, Education, and Psychology and Development Studies departments.  We also had support from the craft club members and a few well known and respected senior students. 


In terms of feedback I am not sure if the fact that there were no visual or verbal indications of resistance, criticism or negative feedback qualify my assessment.  My impressions were that there was an overall decidedly positive reaction to the philosophical underpinnings of the Craft Club project, as presented in this talk.   I do hope though that we will be able to reach a greater audience and I hope that we will be granted another opportunity at a time when there are not so many other things going on campus to redeliver our vision for this venture.

Apologies for the blurry pictures of this event.  For some reason, the usually reliable camera turned out a series of blurred images and I wasn't able to find a clean, sharp picture - the three posted above were the best of the of the lot. 

And with that I conclude this report. I hope that you will be able to check in on us every now and again and let us know what you think.

Sunday, April 22, 2012

Proposed Next Project - things for Mothers Day!

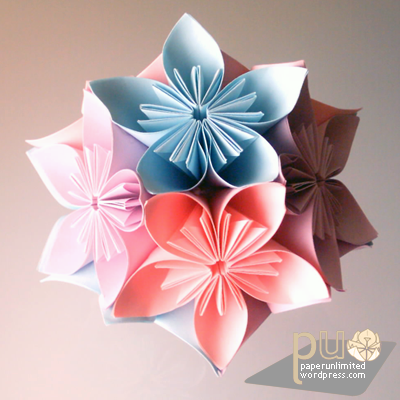
japanese traditional origami kusudama
Mother's day is around the corner and as a student on a tight budget - the pressure is on to find something meaningful and beautiful as mum that is within our economic grasp.  For our next project I thought that we could make a little gift pack series using the ancient craft of origami.
Origami is a traditional art form that originally began in China but was adopted and subsequently gained popularity and master craftsmanship by the Japanese. This form of art became part of the cultural heritage of the Japanese people. Today the word and artform Origami is synonymous with the Japanese.  The word Origami derives from two Japanese words - "orimasu" to fold and "kami" paper. 


Thus Origami is the art of folding paper into delicate shapes and patterns.  One of the first known (if not the first) books on Origami was published in Japan in 1797 and it was called "How to fold 1000 paper cranes".  The Crane is regarded as a sacred bird in Japan, and it became popular myth that if you folded 1000 paper cranes you would be granted 1 wish.  The 1000 paper cranes also  became the subject of a very famous woodblock print (ukiyo-e), another artfrom that the Japanese are famous for, in 1819.  It was called "A magician turns sheets of birds" 

The variety of Origami shapes in the modern world have progressed from the original sacred traditional shapes. Today there are many different fun and modern origami patterns that we can fold.  Since it is Mother's Day - I thought we might learn to fold an Origami Dress and use that as the theme for lovely Mothers Day Card, a birthday and Anniversary Calendar and a little fridge magnet. 

 You will need:   
  1. some scissors. 
  2. some patterned paper - you can draw your own designs on a piece of paper - or you can use some ironed out giftwarp, a colourful magazine page or anything that has a nice pattern or colour..  Cut out some of the paper so that so that you have three squares that must measure 10cm by 10cm, 8cm by 8cm, and 5cm by 5cm.  You will also need some paper to cover the front of your Birthday and Anniversary Calendar - this would look nice if the paper for this contrasts with the patterned paper.  For example a very trendy look right now is to use old book pages as a background - so if you have an old book somewhere that is out of date and no longer relevant that you were going to throw away - save it and use the pages for your art projects.
  3.  a wooden clothes peg as well.
  4. Very strong glue - I always keep loads of White PVA or craft glue on hand - it is a super strong and versatile glue
  5. Sticky tape or cellophane tape to make tabs for the calendar
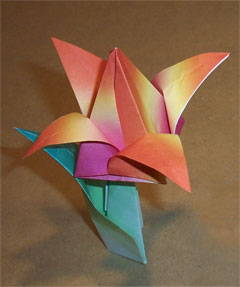
Here are some lovely examples of the origami dress that we will be making:


We will attach that onto a card front, onto the cover of the Birthday and Anniversary Calendar and onto the front of a clothes peg.  We will attach a magnet to the back of the clothes peg and our gift will be ready to go....   

Saturday, April 21, 2012

Project 2 - String Lamps


The craft club is certainly generating interest among the students and staff, academic and administrative alike) - and this week a few young men stopped by my office wanting to join the craft club.  So to keep the project more gender neutral project and ensure it be fun and challenging, I planned the advent of the great string lamp making marathon.  Who can resist a gorgeous lampshade in earthy textures and natural colours. The organic shape and texture is hypnotically drawing. They have the look and feel of luxury. 
Instructables.com
There were a few problems right from the outset.  I could afford to make one string lamp - but the supplies needed for a group of 15 - was a little out of my range. 

At this stage, the running costs of the project fall entirely upon my shoulders - this might be a problem in the future.  Anyway I had to come up with a plan to bring the costs down, which has had implications for the overall projected success of the project as you will find out later on.

But onto the project itself.  Once more we met in the Boardroom, generously lent to us by the Department of Philosophy.  Students were asked a week earlier to bring with them various items needed for the project if they could.  They arrived eager and curious to find out how they were going to create a string lamp from the odd assortment of things they were asked to bring - which included among other things - a balloon, petroleum jelly, string and glue.


I had a feeling that they were not going to bring either right glue or not be able to find the right type of string.  So I decided to bring along half rolls of string, the half container of white glue that I had lying around the house and wallpaper paste.  My rationale was that wallpaper paste holds heavy wallpaper to a wall so it should be able to hold together string nicely right?  WRONG!

The students however were excited and loved that we got to get really messy squishing glue and string and blowing up balloons in one go.  It couldnt get any more childishy joyous than that.  We must have generated a lot of happy noise, because as we working, various members of staff came in t have a look at what was going on.


 All was going well, the instructions were so basic that it didnt take long to explain the method. The students began their projects - everyone was rather happy until they started running out of glue, and we needed lots of it. So my idea was to mix up the wallpaper paste with water and use that as the glue. It seemed to work well. I left the students to themselves - and went to do some admin work with the other staff members in our department.


There was a soft knock on the door - the students had come to call me to have a look at what they had come up with so far.  One of the best things I love about teaching craft is that you never know what creative idea will arise from the original technique.  I entered the room and was bowled over by the variations of string patterns and designs that they had independently come up with.


Anyway, we wrapped up the project with string lamps in the raw form, wet and squishy-like.  They left them in my office to dry - I assured them that the lamp would be rock solid like the example I had made before the class to show them.  A week and a half later - what we have are still very wet and squishy strings.....apparently the wallpaper paste did not work as intended.  But being the great sports the students are - they all reckon - it is not such a big deal because they main thing was that they learned how to make a cool lamp and they learned what NOT to use as the glue!  What a great bunch of people they are!

It was a rewarding and succesful meeting - a few students stayed behind later to tell me that it was the most amount of fun they had since arriving on campus.  For me that was a huge boost of confidence - the craft club beats out the wild parties on campus - YEAY for the craft club. 

Since I began work at the University, I have been wanting to do something meaningful with the students, something different and something that I am passionate about.  My colleague who watched me get ready for the club on Monday remarked on how "lit up" about it I was.  I have to admit, that this project has been the most rewarding thing that I have undertaken since beginning work here.   I have such a great vision for where we can take this - and I hope that we will be able to inspire other students and staff to initiate similar initiatives on campus.

Candice

Project 1 - 2012: Paper Beads


Artistic creativity knows no limits. Even with a non-existent budget, art can be borne out of the simplest of things. When reflecting on the direction of the craft club one of the goals I felt passionate about was to encourage the spirit of an environmentally aware ethic - The vision was to impart the idea that art and craft was not necessarily the luxury of those who could afford expensive art supplies but to be aware of the fact that art most often is the repurposing of everyday items into expressions of creativity. 

different patterns yield different bead shapes
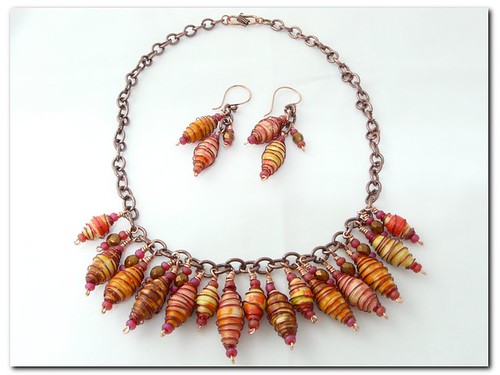
So for the first project of the first meeting of Unizulu's very own students Craft Club, we hit on a way to reuse paper waste created by printing of magazines, newspapers, advertisement flyers and even regular documents.   

Cutting out the bead pattern
The students were introduced to the art of paper-bead rolling. They were taught very basic bead-rolling techniques to create various bead shapes.

Comparing the bead to the desired shape
hard at work


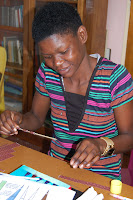
The students seemed to grasp the concept very quickly and set to work rolling and creating their own paper beads.
a skewer helps with uniformity
Once they got the basic technique down, within no time at all they began experimenting with designs of their own.  
blog.craftzine.com (bracelet)
  I then asked the students to find ways to incorporate their paper beads into an everyday item, the idea behind this was to encourage them to be creative - to actively find new and creative ways to apply the skill they just acquired.
 
makerfaire.com

I helped them out a little bit by suggesting that it could be a piece of art, an accessory or even a home decor item.

Of course the students looked at me horrified -
this I believe is the is the result of a generation raised on X-Box, TV and instant apps that predict your text for you - we may have inadvertently trained our children to not think outside the box - literally.   
At this point I sneakily introduce a little bit of Computer skill and Internet research training. I show them how to do an Internet search on various search engines to find inspiration.

cutoutandkeep.net (paperbead curtain)
A quick search yielded some fascinating projects created out of paper beads including incredible fashion accessories, a divider screen, a beaded curtain, decorative napkin rings, designer cards and even pieces of abstract art. 
textiles4you.blogspot.com (bags and purses) 
The sheer volume of amazing things people have done with paper beads was enough to get the students buzzing and they began to talk to each other about ideas they had.  I smiled smugly to myself - this is exactly what I was hoping for....
brooch pin


 Prior to the class I created a quick mini art project using various scrap pieces of wire, paper rolled up tight to make a kind of ribbon, corrugated packaging board, popsicle sticks, hat pins and a white-out pen to write a simple sentiment. I was hoping that it would demonstrate how simple items can be repurposed and recycled into a useful or fun new item. 

As of now - I am still waiting for the students to show me their completed projects.  They are little perfectionists though and want more time to get it just right.  I also think the threat of having their work showcased in the display cabinet is forcing a level of attention to detail with their projects that didn't occur to me.

Well I happily conclude my first report on this exciting new project.  Until next time be gone with our wasteful selves and hello to our creative wasteless selves! 


.